In this last Max-focused lesson, we are going to look at ways to store data. There are many different ways to store data in Max; we are going to focus on the table object, which lets us store pairs of number — useful for creating sequences or control settings.
The table object
You create a new table object by typing “table” into an empty object box. This will create an object with two inputs and two outputs. If you lock the patcher and double-click on the table object, it will show an editing window:

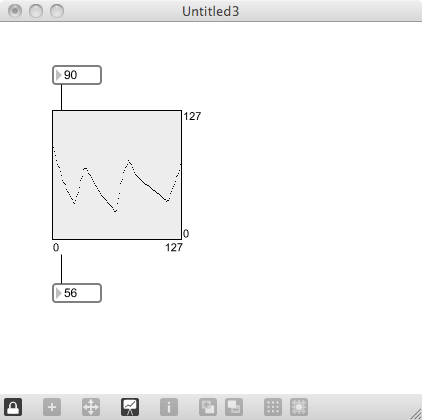
Using this editing window, we can draw in values on an X/Y grid. The easiest way to think about these values is as a key/value entry: the X coordinate is the key (or address) of the entry, while the Y coordinate is the value held at that address. Scribble in a set of values to create a starting point for our examples:
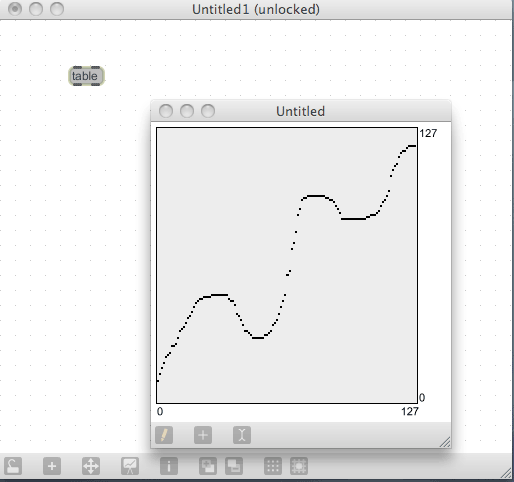
You can close the editing window by clicking on the close button; reopen the table (again, by double-clicking on the object) to see that the values have been saved.
Now that we’ve created some basic data to work with, let’s use some simple Max programming to retrieve these values. Create the following patch:
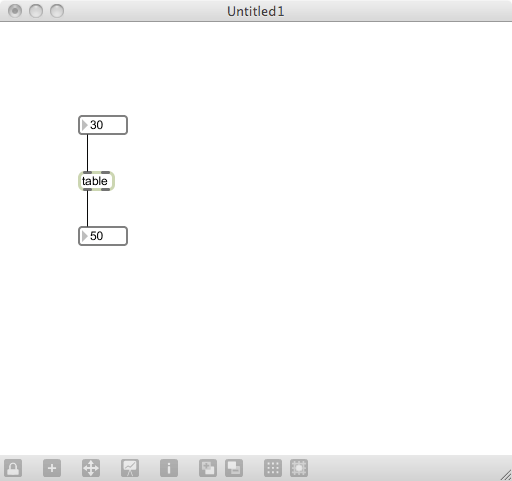
Now, whenever you send a number into the left inlet of the table object, the value that corresponds to this address is send out the left outlet. If you use a slider for this output value, you will see that the contents of the table are easily accessible using a number box for the input.
Creating table contents this way is interesting, but you may want to use the table object to capture information that is created by your Max program. You do this by sending a pair of values to the table object. The first value is the address, the second value is the content to store.
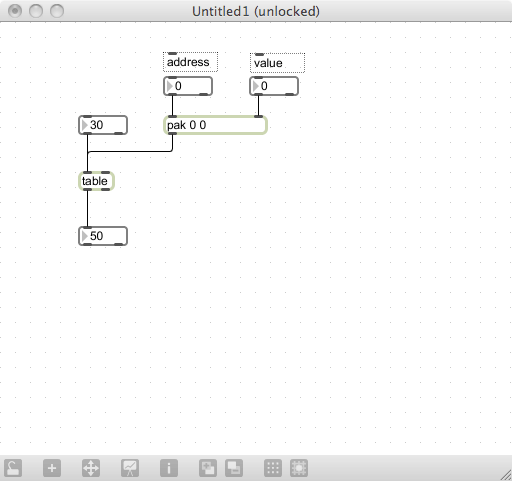
By default, the table stores values and addresses in the range of 0-127: convenient for the MIDI-style values we’ve been using in other parts of the software. Let’s build a patch that creates 128 values in the range of 40-90 using the drunk object:
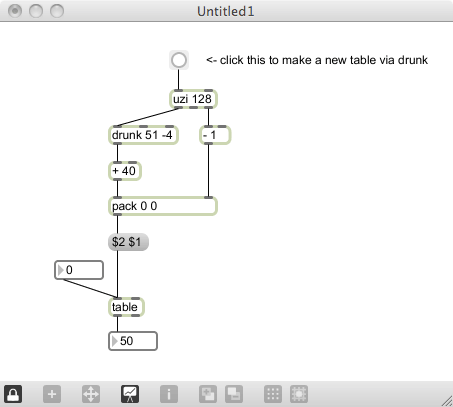
We’ve now created a simple sequence of values that we can use to play notes using some basic Max programming. Create the following table player to hear the results of our drunken creation.
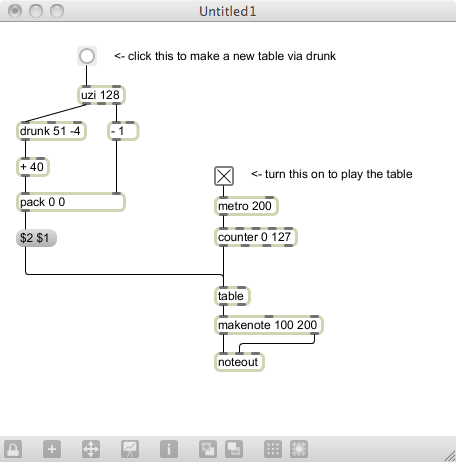
Now, open the editing window and change some of the values. When you close the window and run the player again, you will hear that your changes are reflected in the musical output.
One interesting aspect of the table object is that it can be named — and all tables that share the same name will use the same data. Let’s try this in an extension of the previous patch:
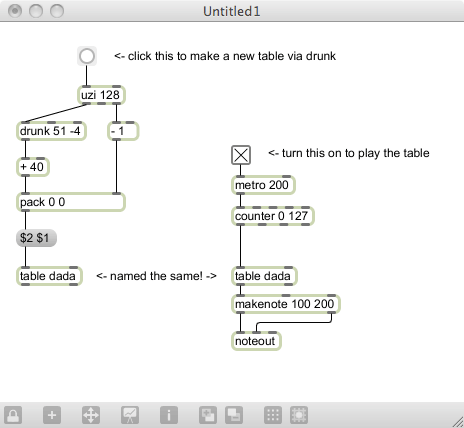
You can open the editor for one table, make changes, then open the table on the other side of the patch (or access the data with the number box) to retrieve it. While our example shows this in a single patcher, it works equally well when the table is stored in another patcher or a subpatcher.
If you want to save the data from your table into a file, or retrieve previously stored data from a file, you can do so using the write and read messages. These connect to the left inlet of the table object; when you click on them, a dialog box is presented that allows you to select the data that was stored. Let’s build a patch that does this:
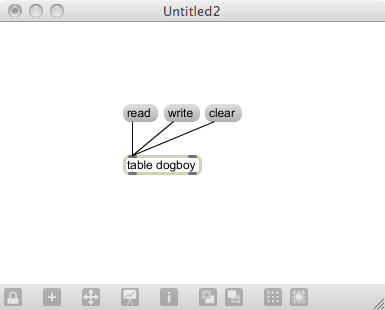
Open the table editor and make some changes that you will recognize — for example, make a “W” shape within the table. Close the editor and click on the write button. You will get a dialog that allows you to save the contents of the table to a file named “mytablefile”. Now click on the clear message to zero out the contents of the table. Verify that the table doesn’t contain your information.
Now click on the “read” message box and select “mytablefile” to load into the table. Once it is complete, you should see the contents of the table has been restored.
One of the inconveniences of the table object is the need to click on the object (or send it an open message) in order to see or edit the values. There is a convenience user-interface object that can help us out…
Friend object: itable
The itable object is a user-interface element that presents the table interface on your patcher window. If you add it from the palette, you will see that it is almost identical to the display in the edit window. You can edit the values within the patcher, and access the data in the same way that you did with the object version.
Now, if you want a single editor, but you want to access the data in many places within your patch, you can use the naming functions of table and itable to share the data. To set the table name on the itable object, you must first have a regular named table object in the patch. Once that exists, you can access that table using the itable’s object inspector:
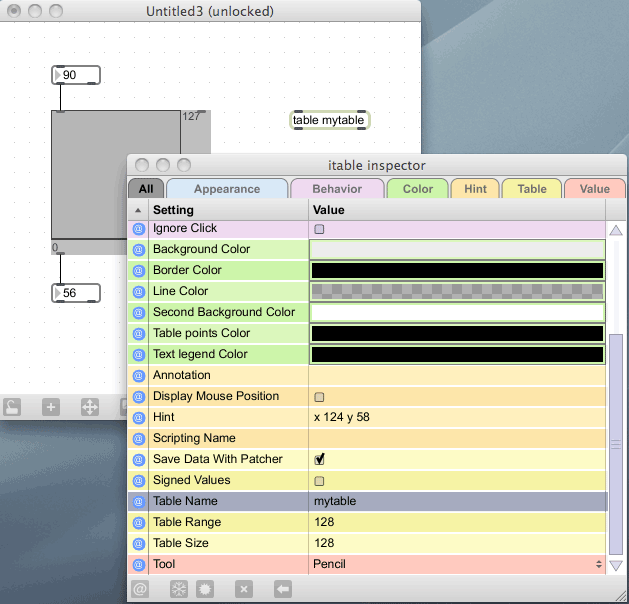
Now, you can have a single editor while accessing the data anywhere in the patch. Make this patch to have an example of this cross-patcher editing system:
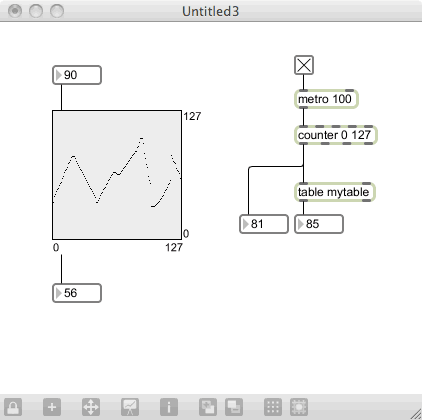
Friend object: loadbang
Using the table object — especially with the read/write functions — means that you can save data whenever you make something particularly cool. But it is still a little troubling to have to hit the read message and find the file every time you start your patch.
The easiest way to deal with this is to use the loadbang object to make something happen whenever you first load a patch. As its name implies, the loadbang object produces a bang message whenever the patch is loaded. Here’s an example of a patch that will load our previously saved data whenever the patch is loaded:
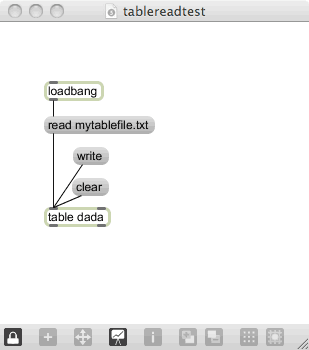
Save the patch and close it. Now, reopen the patch — you should see that the data is immediately loaded from the requested read message, resetting our data to the last values we used.
There is a converse to loadbang — called closebang — that will produce a bang message when a patch is about to be closed. However, you want to be careful using this for file saves, for example, since it may end up overwriting your work even when you don’t want that to happen!
Related object: umenu
The umenu object is another way of storing and selecting items, but in this case the items are textual values that used like drop-down menus. Here’s an example of umenu in action:
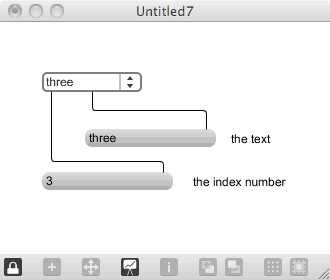
You can enter the data programmatically, but you will normally have a fixed set of values. You can do this in the umenu inspector — you enter them in the “Menu Items” entry. You click the edit button, then enter in the menu items separated by commas. This is saved with your patch, so there is no need to load the data when you open a patch.
You have two output options with umenu: you can either get the text of the menu item, or you can get the index number of the selected menu option. Using the index is really useful for parameters that are numbered from 0, such as the counter direction option. Here’s an example of a patch that changes the direction of a counter with a menu selection:

The above options give a few ways of dealing with value storage and selection. As with many things in the Max world, there is no “One Right Way” to do something — there are just options that may or may not work for your particular application. Hopefully, this lesson has provided you with options for getting your work done.
Next: 12. cycle~