More about the Matrix
Remember when we placed a print object on the output of the jit.qt.movie object and saw the funny character string in the Max window? At the time, we discussed that this is a pointer to a data structure the contains a video frame. That data structure is called a “matrix” of data, and is the way that all visual data is stored and moved within Max.
The data stored in a matrix can be very complex, depending on how the matrix is defined. When jit.qt.movie reads a frame from the movie, it creates a matrix for output that uses “char” data (which is the range of numbers between 0 and 255), and has four planes — one each for the red, blue, green and alpha colors in the QuickTime movie colorspace. Finally, it creates this matrix with the dimensions of 320 cells wide and 240 cells high — because that’s what we told it to do using the 320 and 240 arguments.
An easy way to see the values stored in a matrix is to connect the matrix-bearing patchcord to a new object: jit.cellblock.
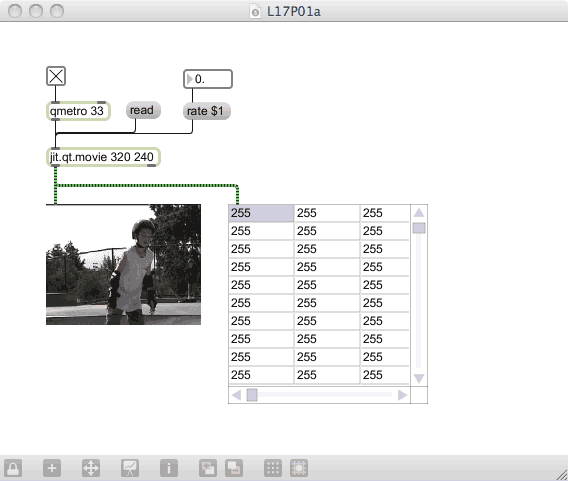
The cellblock object can do many things, but one of the most useful is the ability to peer into a Jitter matrix to see its contents. If we use a basic connection, we will see one (probably unchanging) display of 255’s; this is because it is showing us the contents of the first plane — the alpha channel. Most movies have all of their alpha cells set to 255, since we don’t really need transparency in our movie playback.
Create the following patch to get a more useful view of the matrix:
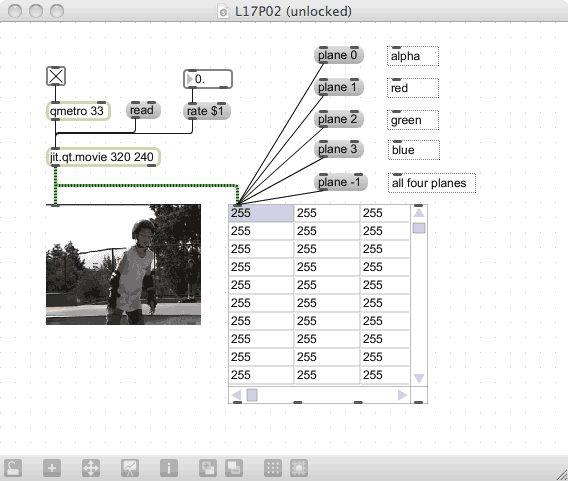
By selecting a plane, you can see the values of each of the colors in the matrix, and you can scroll around to see their values change across matrix dimensions. You can also select “plane -1” to show all four planes; this data can get sort of wide, so you may need to open the inspector for the jit.cellblock and change the cell width. This gives you a view of the complexity of the data stored in the matrix.
Matrices can be of many different types and sizes. The data type stored in the matrix output of the jit.qt.movie’s output is of type char (0-255), but you can also have matrices of int (-32768 through 32767), float32 (32-bit floating point) or float64 (64-bit floating point). The type of matrix you will use will depend on the kind of processing that you need to do and the information you need to store — in general, all movie-type video will be of type char.
You can express the size to whatever you want to work with. If your object expresses a size different than the incoming data, that data will be “coerced” into the new size, warping or stretching the video image to suit. Likewise, if the incoming data is larger than the expected size, the video image will be reduced in size — and all of the reduced data will be lost. If you are concerned about video quality, you will want to pay attention to the sizing of the matrices you are using.
You can also have multiple dimensions and planes — up to 32 of each. This is pretty esoteric stuff, and isn’t widely used outside of complicated scientific data manipulation and 3D graphical storage. What is most important now is to understand that most of the video information we are going to use is of type char, has four planes and uses X and Y dimensions that need to match our source material (when possible).
The jit.matrix Object
To this point, we’ve used existing movies to create our visuals, and depended on jit.qt.movie to generate the matrix data. What if we want to generate our own visual data? To do this, we need to create a matrix manually, using the jit.matrix object. Create the following patch to see how we do it:
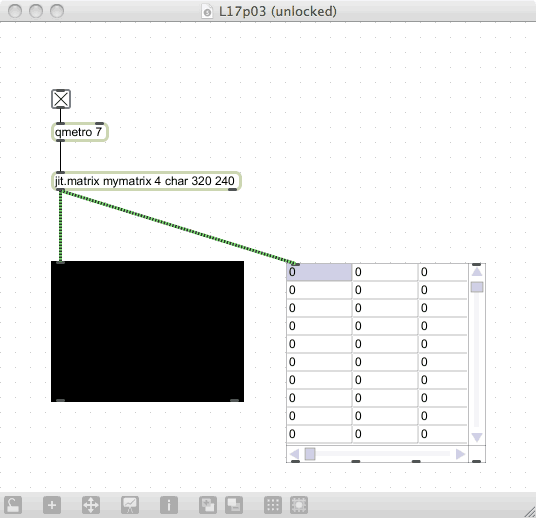
Notice that we need to define a number of characteristics using arguments. These are (in order): the matrix name, the number of planes, the type of data, and the dimensions of the matrix. In this case, we’ve given it the name “mymatrix”, declared it to have four planes (for alpha, red, green and blue), and set it up to be a 320x240 grid of data. How do we populate the matrix? One way is to read in some matrix data from a stored file; convenient, but it uses a proprietary format that you aren’t likely to find laying around your harddrive.
Another option is to fill the matrix with our own data. Luckily for us, there is an message that does that: the setall message. We can send a setall with four values, and all of the cells in the matrix will be set to that color. Create this patch to see it in action:
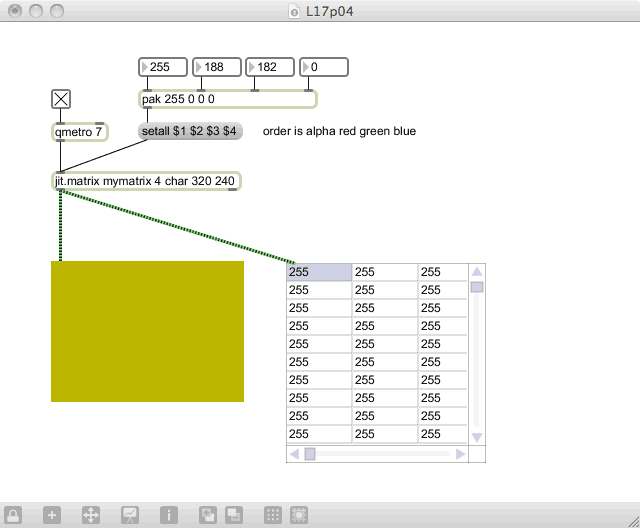
Since we are drawing to a jit.pwindow, and there is no other data to be displayed, changes to the alpha channel aren’t displayed (although we’ll see transparency in action shortly). Any other changes will change the color of the display, proving that we are changing the color data of the matrix. This should give you a clue about creating an interesting color show using integer data, so let’s try it as an exercise!
Exercise
Create a video matrix (4 planes, char data, size of 320 240), and use the setall message to create an evolving color display where the red, green and blue change at different rates. Since you know the maximum and minimum values (0 and 255), you should be able to use the counter object to make it change. Clock each of the colors at a different rate so that we get an ever-evolving color display.
Basic Positioning and Compositing
Now, if we want to start building up more complex matrices from our basic “color swatch”, we need to be able to position a matrix in a specific position within a larger matrix. You do this by feeding one matrix into another, and specifying to the second one that you wish to place the matrix into a specific location. That sounds complex, but it’s not so bad. Create this patch for an example:
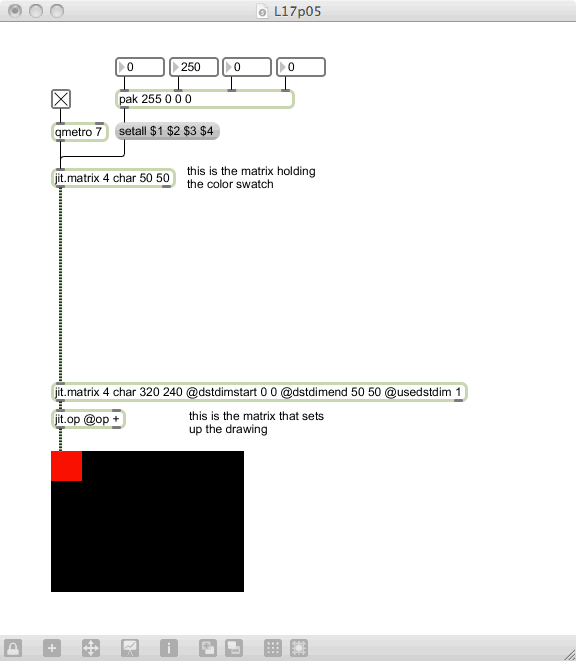
You can see that we are able to place the color swatch into the top-left corner by specifying a set of attributes: dstdimstart, dstdimend and usedstdim. These are abbreviations for “destination start”, “destination end” and “use destination dimensions”, and tells the matrix that it should place the incoming matrix at a specific start and end location. This is great, but it would be helpful if we could change this programmatically.
Well, we can. Any attribute that is named in the object can also be changed with messages. So we can change the patch to something like this:
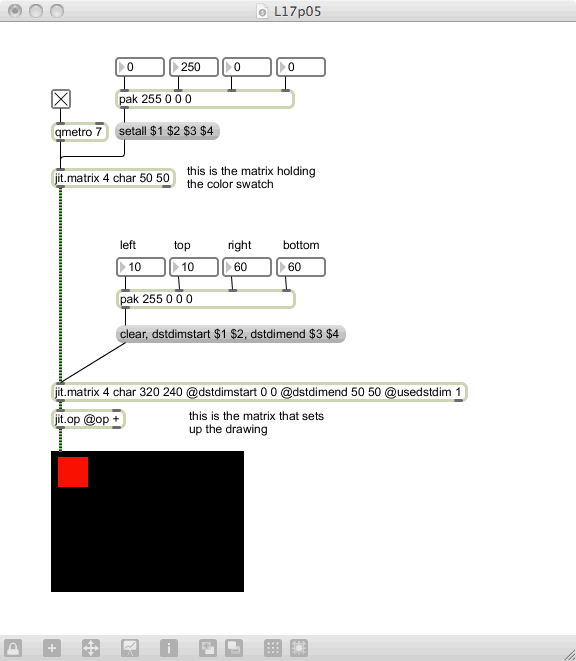
Now we can change the start and end points of the matrix destination without having to reinitialize the jit.matrix with new attributes. One thing you should note: the packed dimensions go to a message box that formats the messages, but the very first message is a “clear” message. This forces the matrix to be cleared (to black) prior to the drawing, so that no trails are left.
Exercise
Create a simple color swatch patch similar to the last one, but use some Max programming to make the swatch move around the display automatically. Try to be creative with positioning and the use of both counter-like and random-like behavior.
At this point, we are able to take a block of color (as a matrix) and place it on a spot within a window — and resize it at will. However, we don’t really know what kind of resizing is happening, because we are just working with a solid color. In order to see what the automatic resizing is doing, we need to use an image. Luckily, we can import an image into a matrix using the “importmovie” message (so named because it imports using the QuickTime Movie importer, not because it will import a whole movie). Try altering your patch to include the importmovie message (instead of the color block idea):
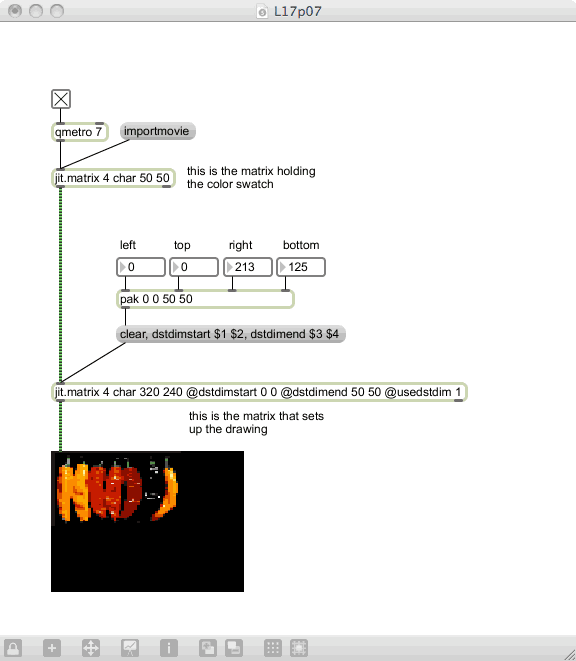
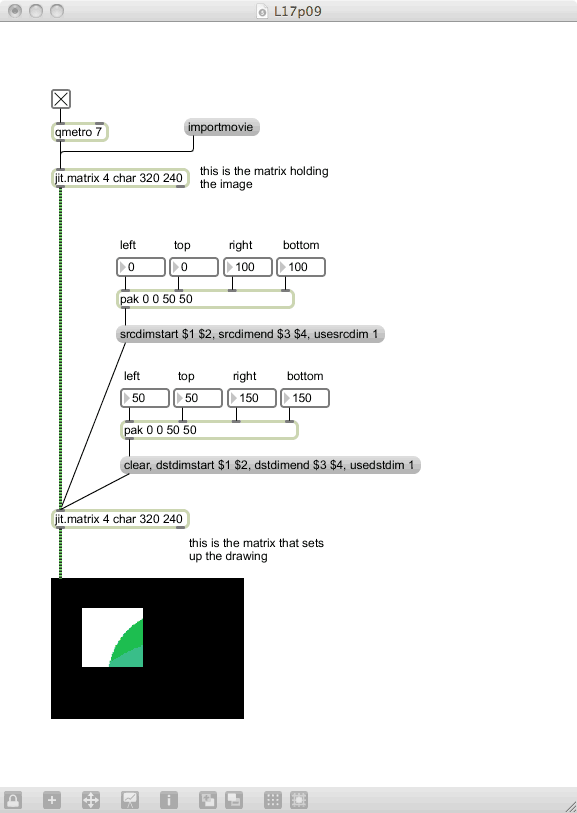
Now, when we do the resizing, we see that the image is stretched around to fit the new destination. This can be useful, and it can be fun, but it may not be what we are trying to achieve. Perhaps we just want to use a portion of the image, and not have it moved within the window; to do this, we have to change our approach. Instead of changing the destination dimensions (and letting the system resize our image), we need to select the source dimensions and have the system display it without resizing.
We do this using the attributes srcdimstart, srcdimend and usesrcdim. This changes the way that the matrix uses the incoming data, choosing the segment of the video frame that is displayed. Try this patch:
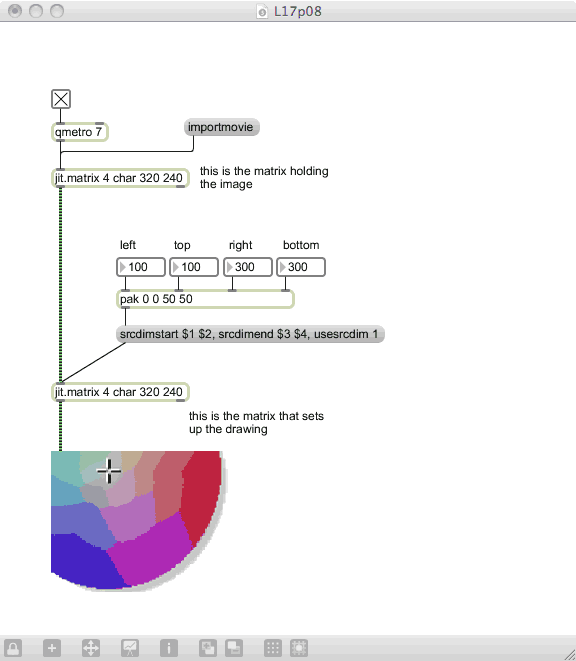
If you use the “colorwheel.jpg” file as an example image, you will be able to see how this works — it selects a portion of the image and displays it in the entire window. Choosing a portion of the original image is cool, but it would be nice if we could still resize it within the window. To do this, we have to reincorporate the destination information with the source information:
Exercise
The above patch still allows warping of the image, but let’s say that we always want the image to retain its aspect ration. This means that we should be able to set the top-left position (of both the source and destination), and have the width remain the same. Change the patch above to maintain the appropriate aspect ration while still allowing me to move the image in the window.
Now, if we can position one matrix in a window, we should be able to do two, right? It’s true, but we need to do a little extra manipulation. Whenever we place a matrix in a window, it just plops the image in the window without concern about what was there previously. Therefore, if we would just duplicate the above code and send both matrices to the window, the last one to send a matrix would “win”, and the results would be a single image. We have to do some sort of code to combine the two images, but what do we use?
One option (and there are many!) is to add the two matrices together. When we do this, it will add the contents of the two matrices cell-by-cell, and will create a composite image from the two. In order to add two matrices, we need a new object.
Related Object: jit.op
Max has a ton of math objects: +, -, *, /, % and others. Jitter chose a different approach: there is only one math object, and it has an attribute that determines what it does. In our case, we want to use the ”+” operation, so we have to tell jit.op that is what we want to do:
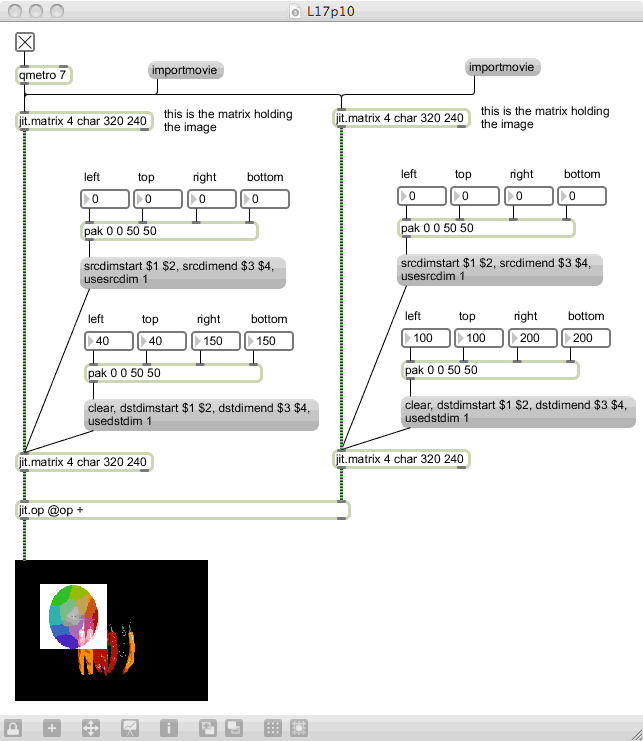
This gives us the ability to combine/composite the two images into a single window, with complete control of the image segment, output location and compositing that is done.
Next: 18. jit.brcosa