One of the things that Max does very well is translate data from one type to another — or from one range to another. This is important when you are creating generative work, and is critical when you are using hardware devices. In this lesson, we will look at several ways to coerce numbers into data that is easily usable.
The scale object
Since we will often want to force numbers to be in a defined range, we will sometimes want to scale them from an input range into an output range. That’s what the scale object lives to do. Let’s create a simple MIDI player that we can use to do some experiments:
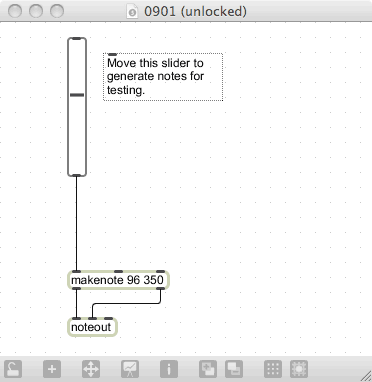
In this case, instead of randomly generating MIDI notes, we are going to use a slider to enter notes. As it exists now, we can play the entire range of MIDI note — from MIDI note 0 all the way through MIDI note 127. The problem is that (to my ears) MIDI notes great than 100 are painfully tinny, and MIDI notes below 36 are uselessly low (especially on laptop speakers). So, we need to scale the notes of the slider to the range of 36-100. Here’s how it looks:
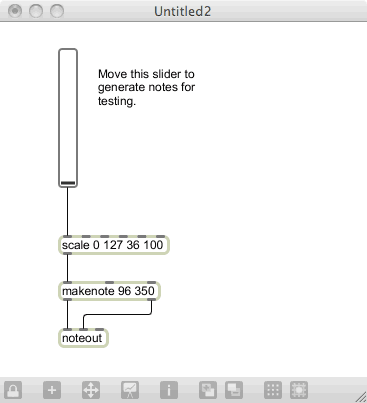
The four arguments set up the input and output ranges. The first two arguments are for the lower and upper input ranges. The second two arguments are for the lower and upper output ranges. So this setup says that the scale object should expect input in the range of 0-127 and transform it into values in the range of 36-100.
Now, you could perform this functionality with some math object, or by changing the range of the slider and adding an offset, but the scale object provides a one-stop option for range adjustment. Another advantage of the range object is that either of the range options can be changed with messages to specific inlets. The leftmost inlet is for the incoming number. The next two inlets are the two input ranges, and the second two inlets are for the two output ranges. The last input is for the exponential factor, which changes how the calculation is made.
Let’s add some number boxes to the scale object and play around with ranges. Since the input range of the slider will always be 0-127, we don’t have to change those (yet). But we will want to experiment with changing the output range, so let’s connect integer number boxes to the two rightmost inlets.
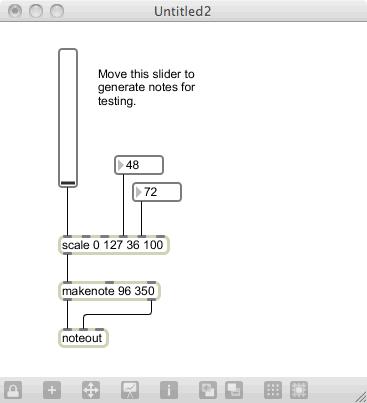
You can see that changes to the outlets don’t cause new output, but they immediately change the output when you move the slider. Now, change the “low” (first) value to be higher than the “high” (second) value. Now, when you move the slider, you get an inverted range of notes — the object saw that the range had inverted, and automatically changed its calculation to match.
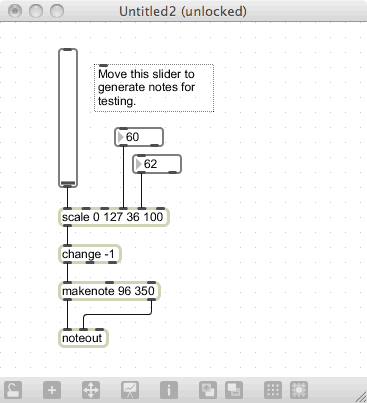
Now, in the real world, this patch has a rather serious problem. We can see it if we make the range very small. Change the low range to 60 and the high range to 65. Now, when we move the slider, we get a lot of duplicated notes of the same value. This is because the object is getting input and is required to produce output — even if the output is unchanged from the previous message. In order to squelch this output, we need to learn another object.
Friend object: change
The change object is a “remove duplicates” object — it will accept numeric input, but only produce output when the number changes. So, if the object gets the values 60, 60 and 62, it will only output the first 60 and 62. By putting a change object behind the scale object, you will remove duplicates from the output:

The change object accepts one optional argument: the initial starting point. By default, change assumes that you are starting with a “0” as it’s internal value. However, if it is possible that a “0” might be the first number you see, you will want to put in an argument: “-1” often works well when you are going to deal with positive numbers. It’s always pretty wise to put in an argument, just to make sure you aren’t going to be surprised.
The argument also works to tell change whether you are expecting integer or floating point values, which we will look at shortly.
Friend object: rslider
While having two number boxes is OK for setting the range occasionally, it is a lot more convenient to have a user interface element that can set both values with a single mouse move. The rslider object does this:
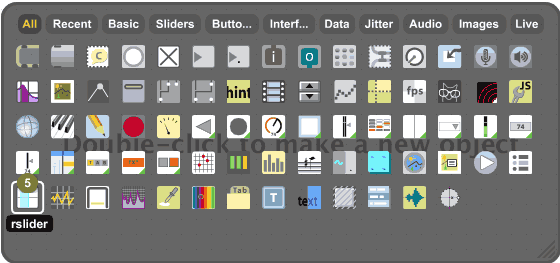
You select ranges by swiping your mouse along the range, and scale the range by pressing the Option (Mac) key. You can also move the current range up or down by holding down the Shift+Option keys while moving the mouse over the range.
The output of the rslider object is two values: the low and high end of the range. This is perfect for connection to the inlets of the scale object. Attach the two outputs of the rslider to the two “destination value” inlets of the scale object, lock the patcher, and set a range with the rslider. Now move the slider object to play back ranges of notes and hear how the playback range changes.
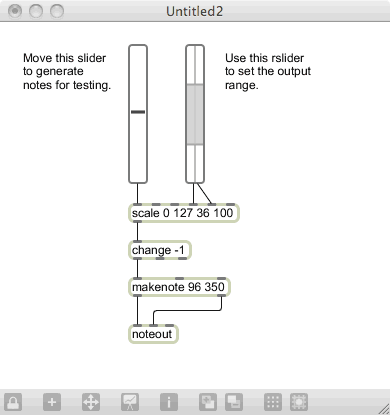
You may want to connect number boxes to the outlets of the rslider in order to see the actual values that the rslider is outputting.
Exercise
Modify the patcher to have a metro drive the slider with a random value. Add another slider to modify the MIDI volume (like we did in an earlier lesson), and drive that with another random value. Scale the outputs of the two sliders to a range that can be set with an rslider, and listen to the results. It should look something like this:

Friend object: clip
Another potential issue with the scale object occurs when the incoming value exceeds the scales input range. Create a new patch and make the following patch:
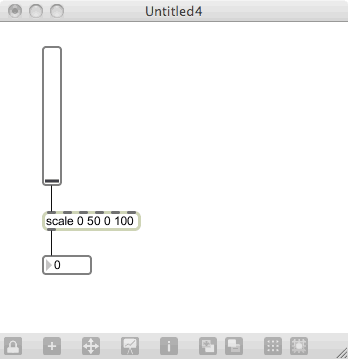
The slider puts out values in the range of 0-127, but our scale object is looking for values in the range of 0-50. When we move the slider past the number 50, the value keeps increasing; it simply continues the conversion using a formula that was calculated for the expected range. If your playback device can’t deal with the out-of-bounds values, you will need to limit the output. You can do this using the clip object.
The clip object accepts two values: the minimum and maximum values allowed to pass. If an out-of-range value is input, it is clamped to the range of values entered as arguments. The clip object has two additional inlets, which allow you to change the low and high values in realtime. Create the following example, and see how the clip object changes the output created by the slider/range combo:
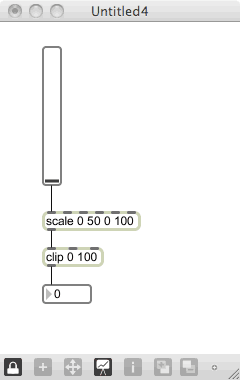
Using the scale, change and clip message, you should now be able to accept incoming messages and manipulate them into any number range that is useful for your application.
Next: 10. pattr